Contact Form 7 Wordpress integration with the Kommo
Integration cost
- 1 year − $70
- 6 months − $45
- 3 months − $30
- 1 month − $15
Add a site to the widget
If the widget is already installed in Kommo, you do not need to install it again.
To add a website to the widget, follow these steps:
- Go to your Kommo account and open the Settings > Integrations > Installed section.
- Find and click on the widget icon to open its settings.
- In the window that opens, add your website URL and click Save.
- After saving, the website will appear in the list.
- Now you can install our integration plugin so that all data from Contact Form 7 is sent to Kommo.
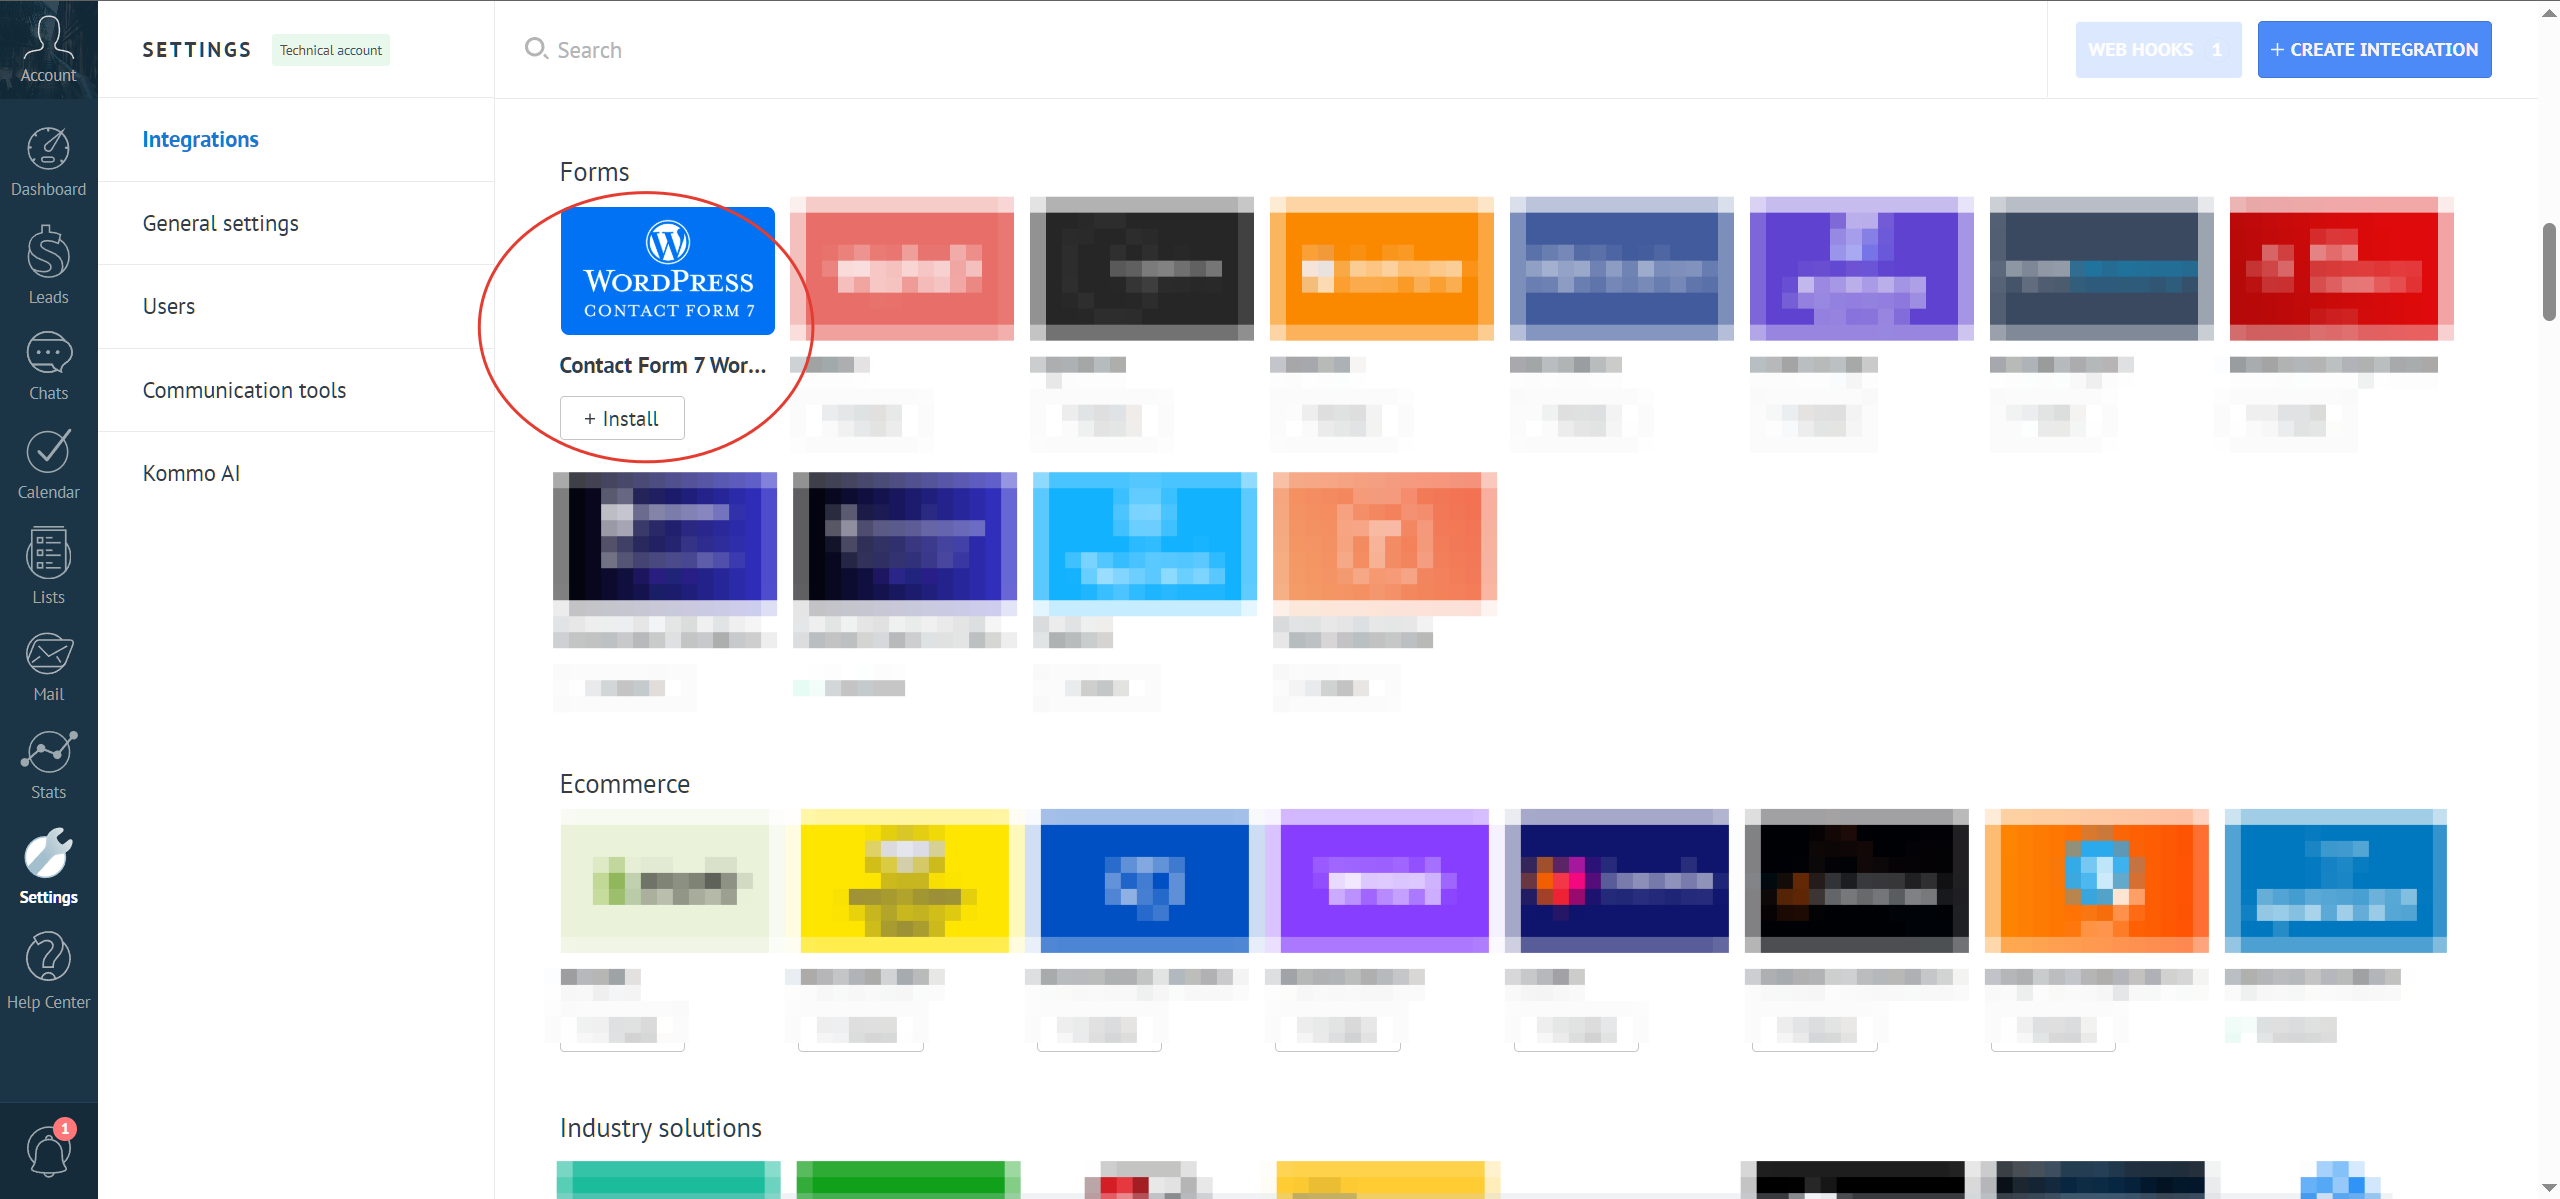
Installing the integration plugin
First, you need to add your website in the widget settings (Kommo) and only then install and activate the plugin!
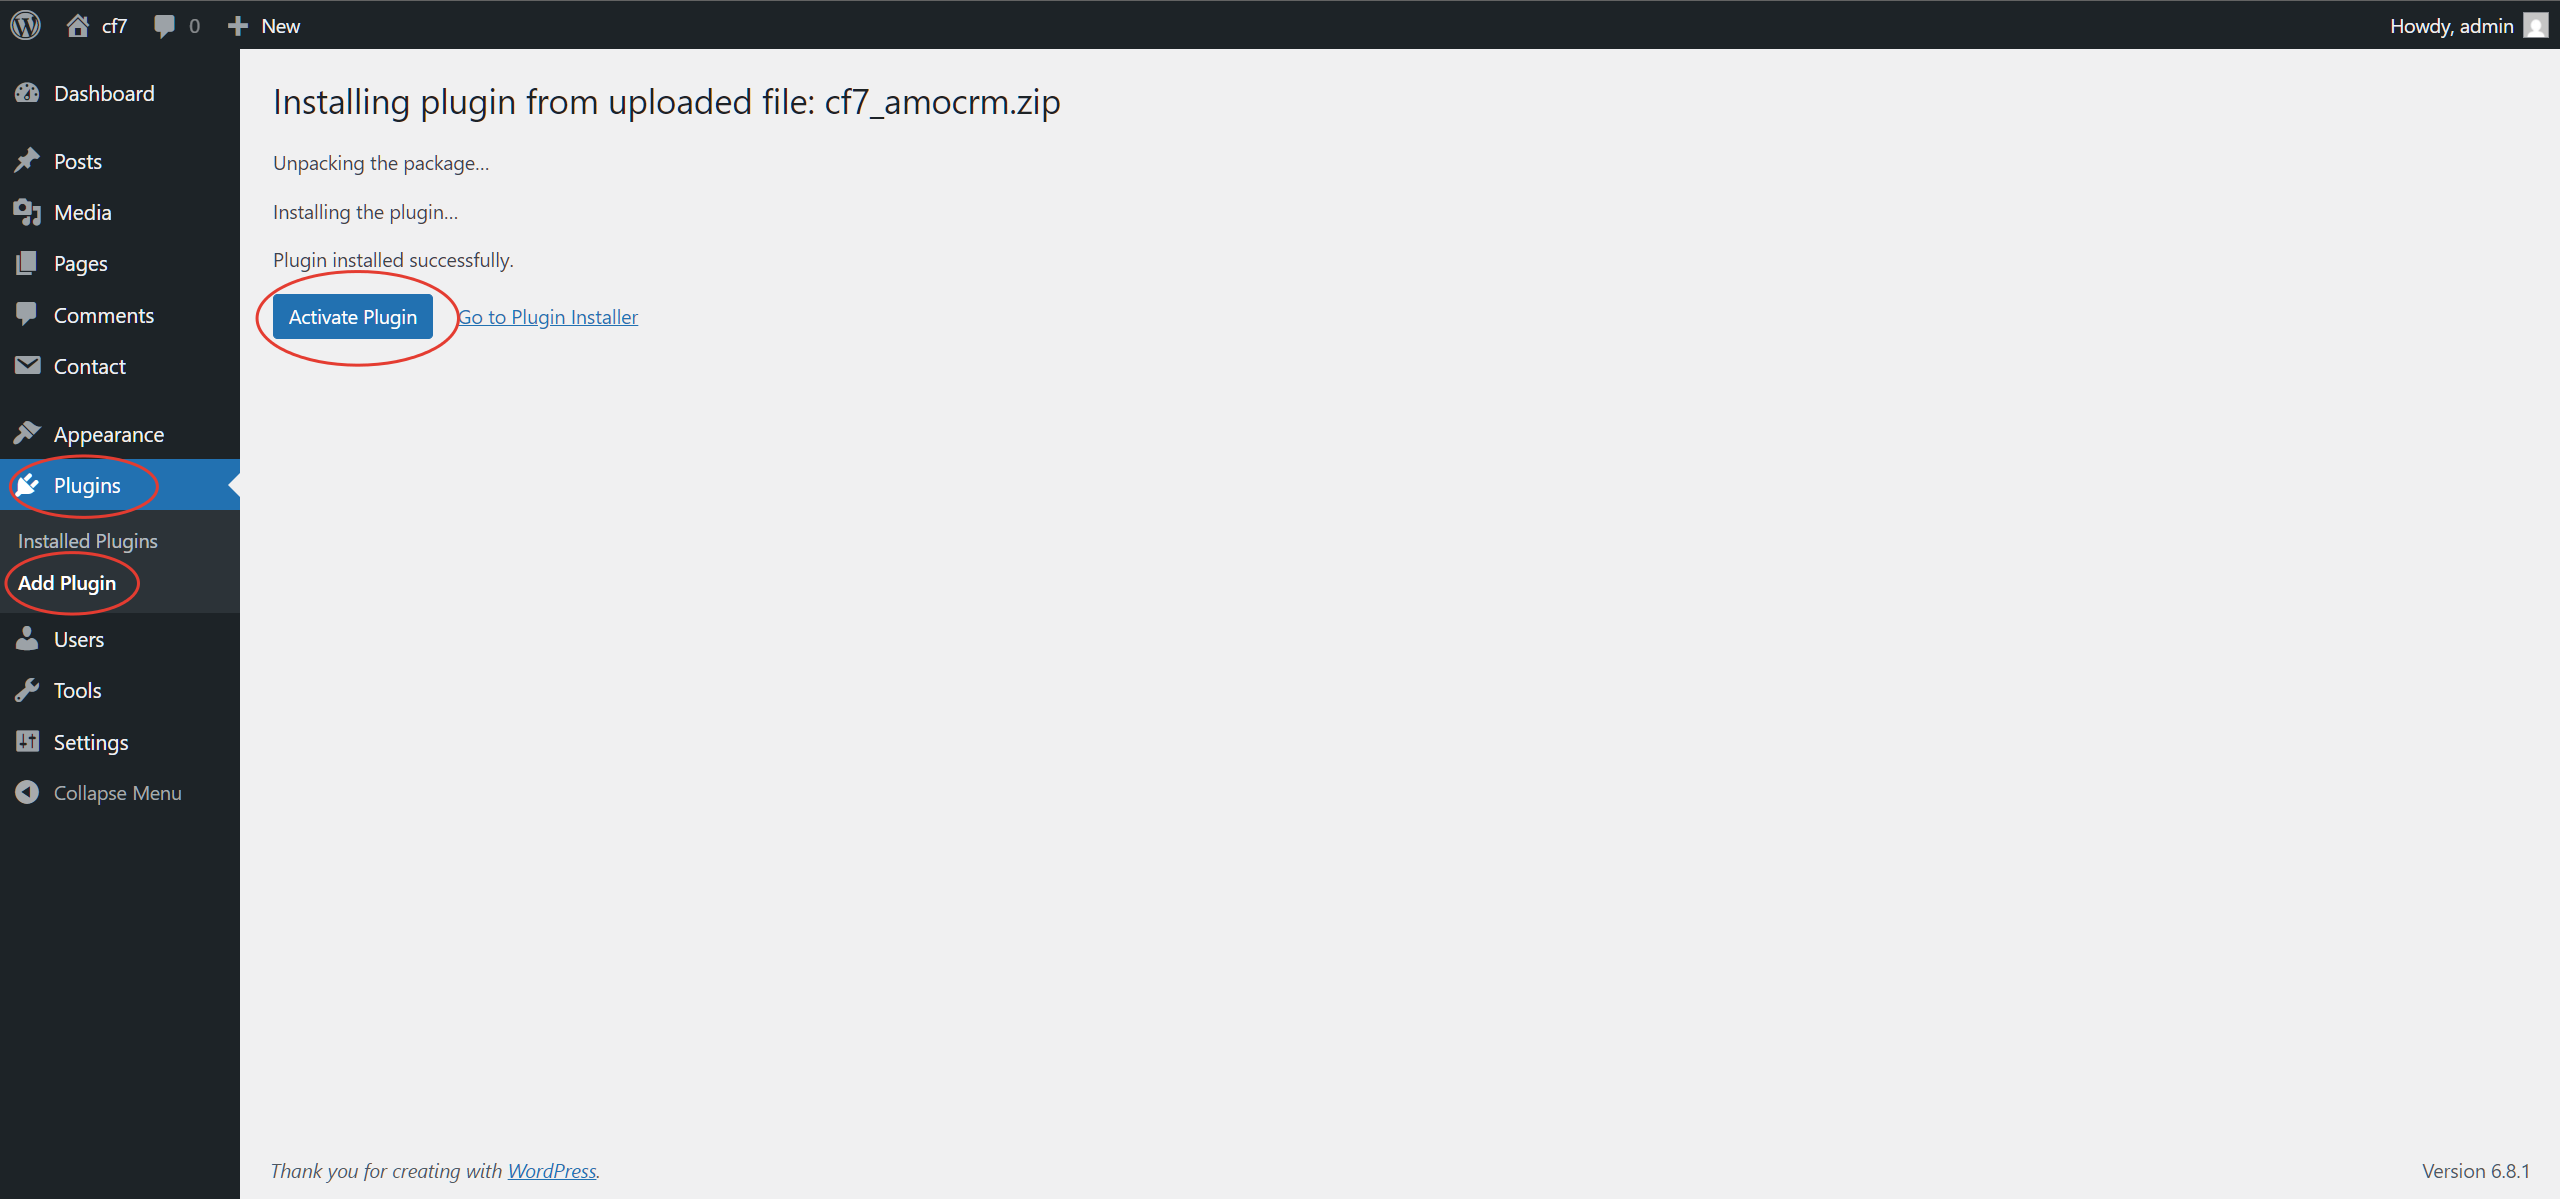
To install the Contact Form 7 Wordpress integration plugin with Kommo, first download it using the link above. Then, log in to your site's Admin Panel, go to the "Plugins" section, and click "Add Plugin." Next, click "Upload Plugin," select the downloaded plugin archive, and click "Install now." After installation is complete, activate the plugin by clicking the appropriate button.
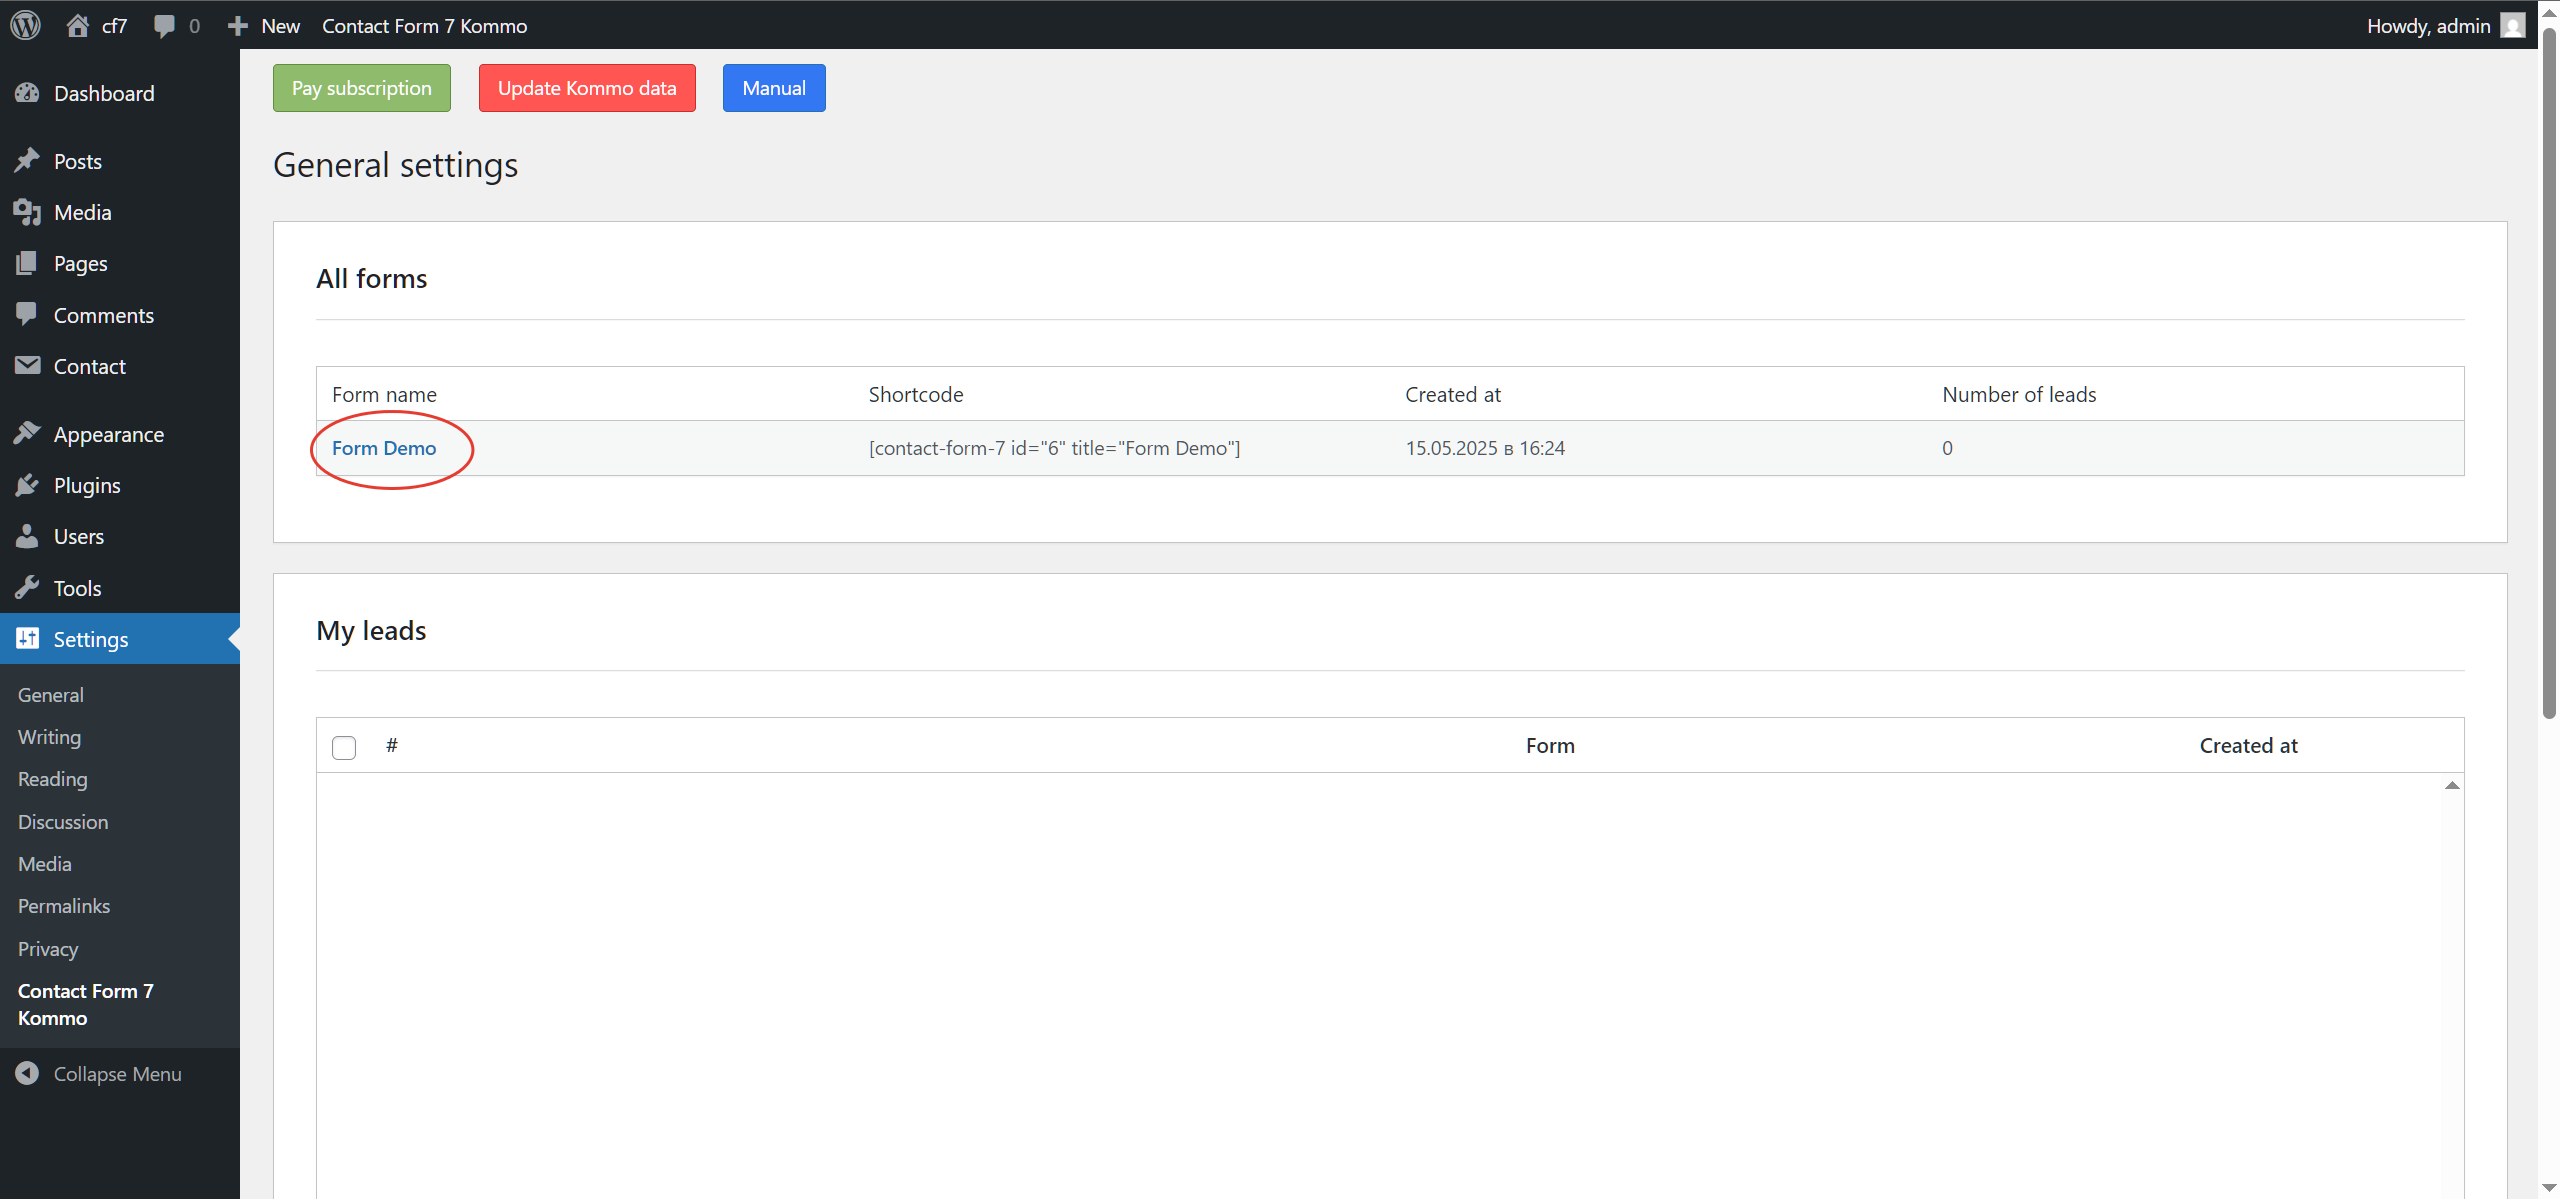
Accessing plugin settings
To configure data transfer from the form to Kommo, select the desired form and click on its name. You will then be redirected to the settings page, where you can perform the necessary actions.
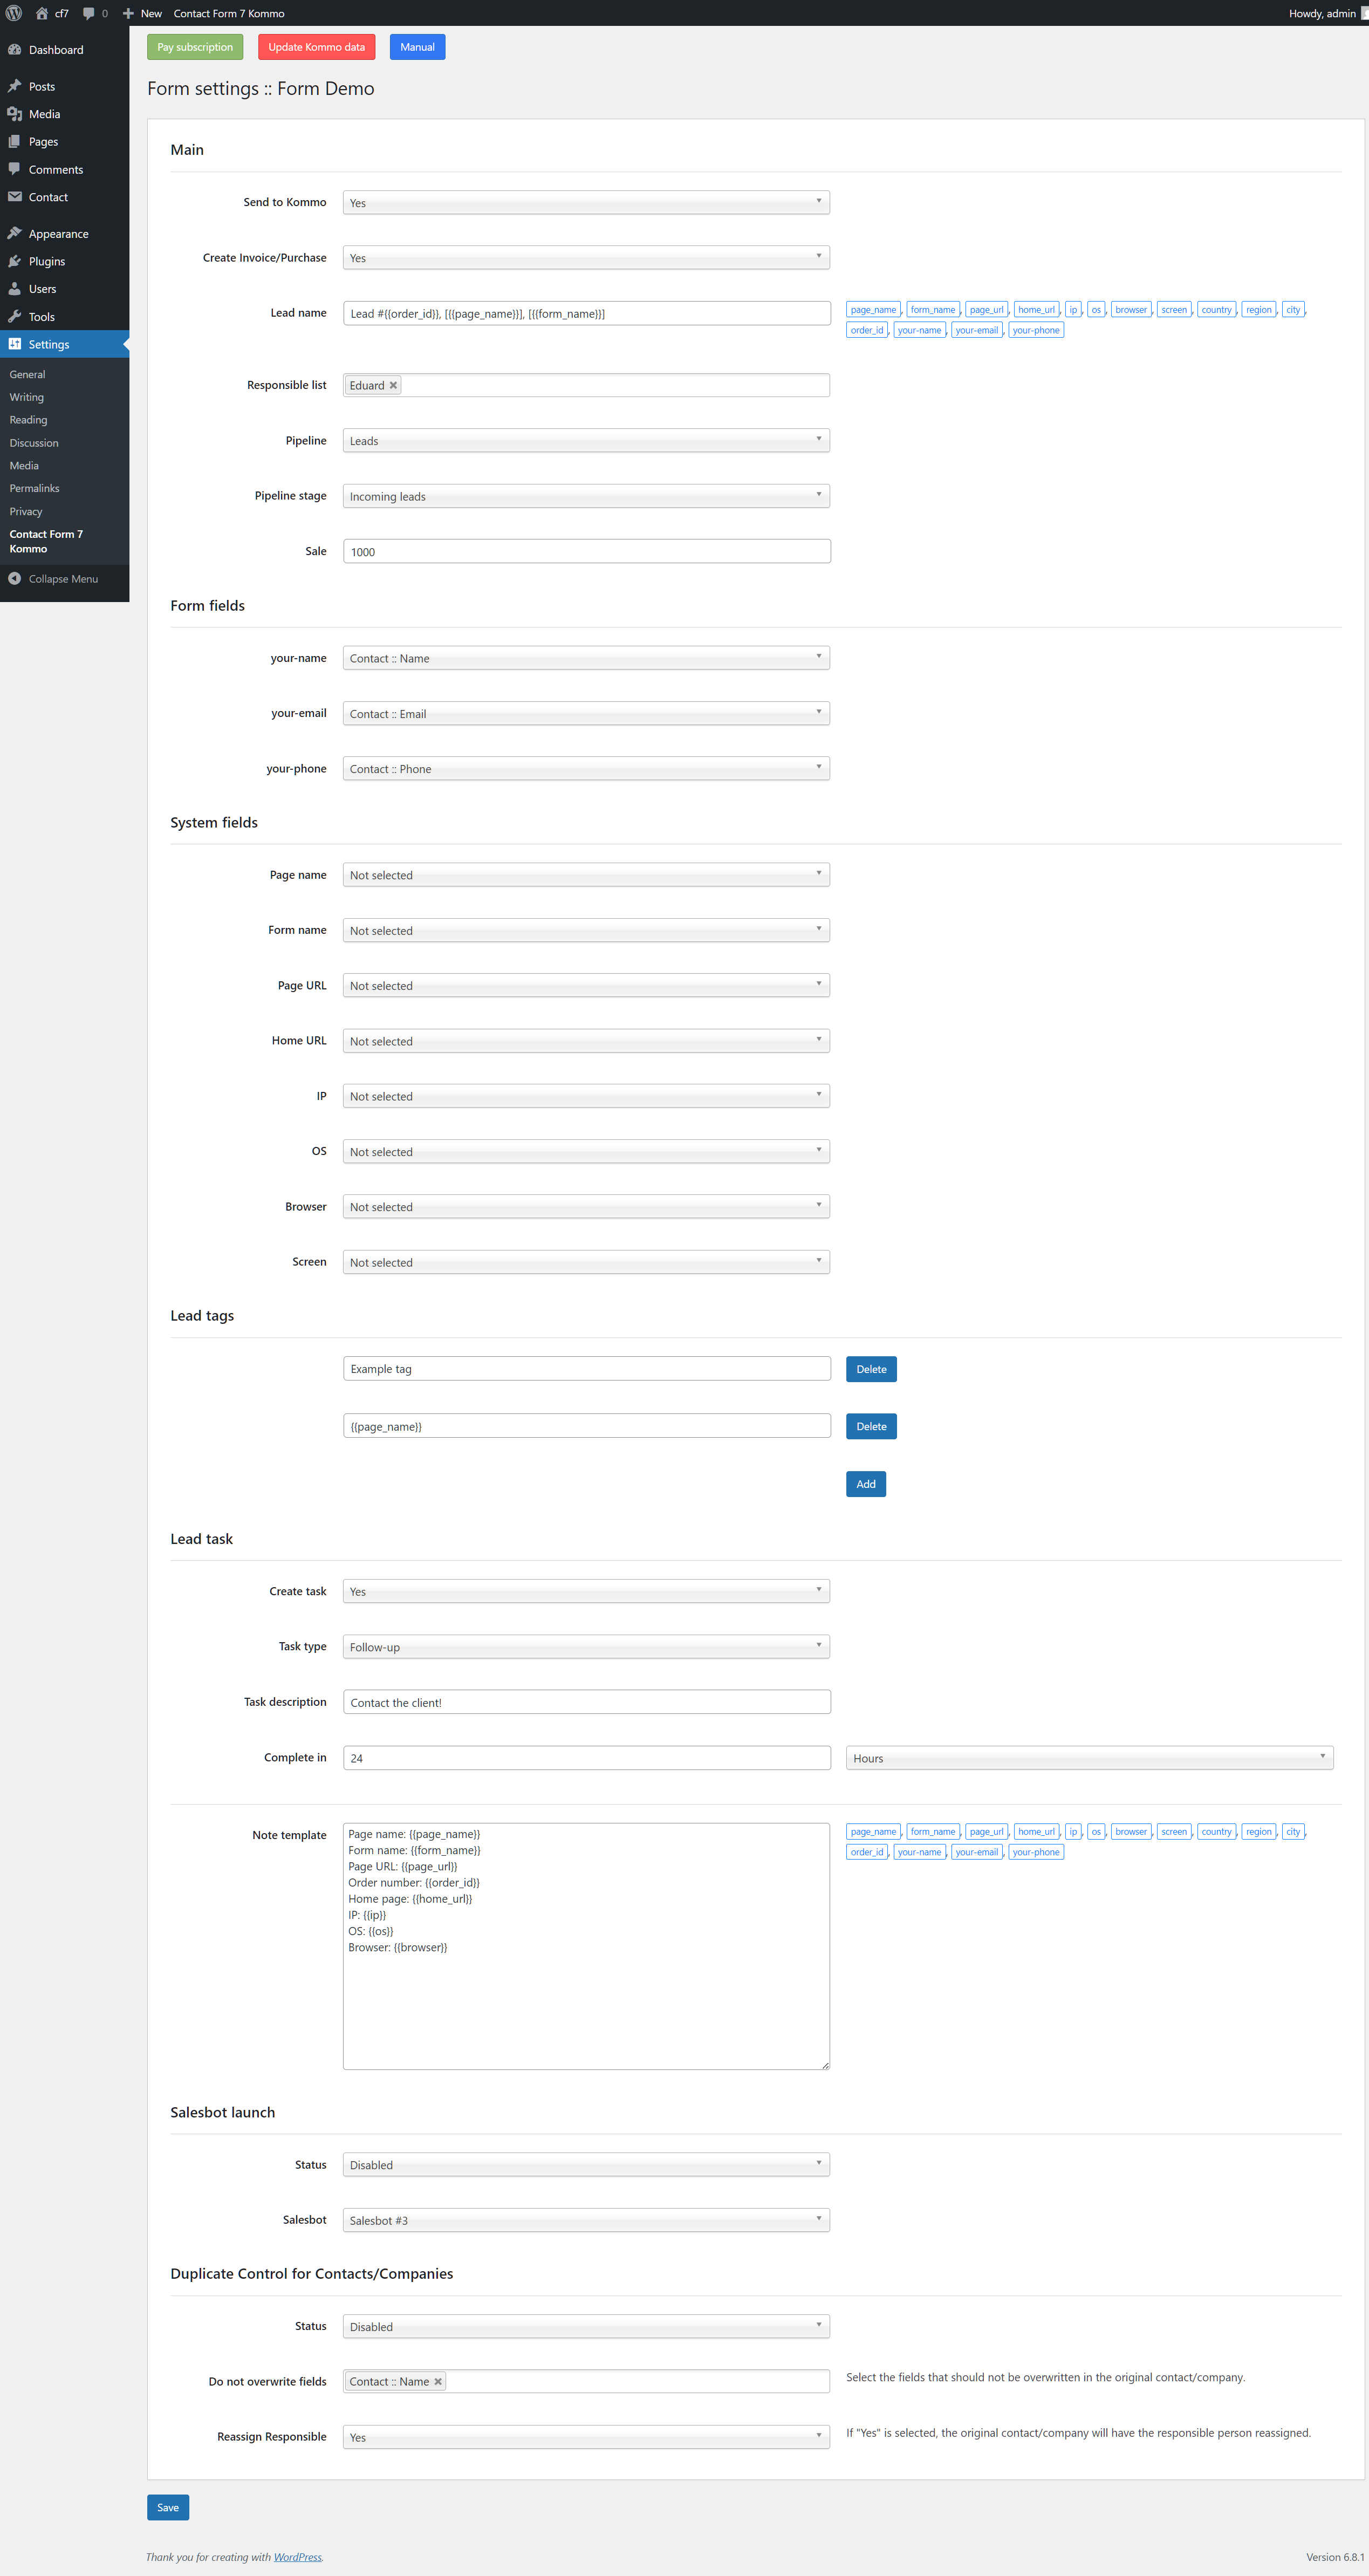
Set up form
Adjust the settings as needed by specifying the Lead name, selecting a responsible person, pipeline, Lead stage, and so on. Once configured, click "Save."
Form settings explanation
Send to Kommo - if set to "Yes," the form data will be sent to Kommo.
Lead name - you can create a dynamic Lead name using custom text and selecting macros on the right. For example, {{order_id}} is a counter of submitted requests.
Responsible list - select the responsible users to whom the Lead, contact, company, or task will be assigned.
Pipeline - select the pipeline where the Lead will be created.
Pipeline stage - you can select a pipeline stage or leave it as "Unprocessed."
Sale - if necessary, specify the Lead sale. You can set it to 0 or leave it blank.
Form fields - for each form field, you can select a Lead/contact/company field where the entered value will be sent.
System fields - you can additionally send system field values to Kommo (optional).
Lead tags - add tags for the new Lead if needed. You can use macros or custom text.
Lead task - if enabled, a task will be created for the Lead. Task descriptions can include macros.
Lead note - a note will be added to the Lead, which can include custom text and macros.
Salesbot activation - if you need to trigger a salesbot after Lead creation, set "Status" to "Enabled" and select the salesbot. If not all salesbots are displayed, click "Update Kommo Data."
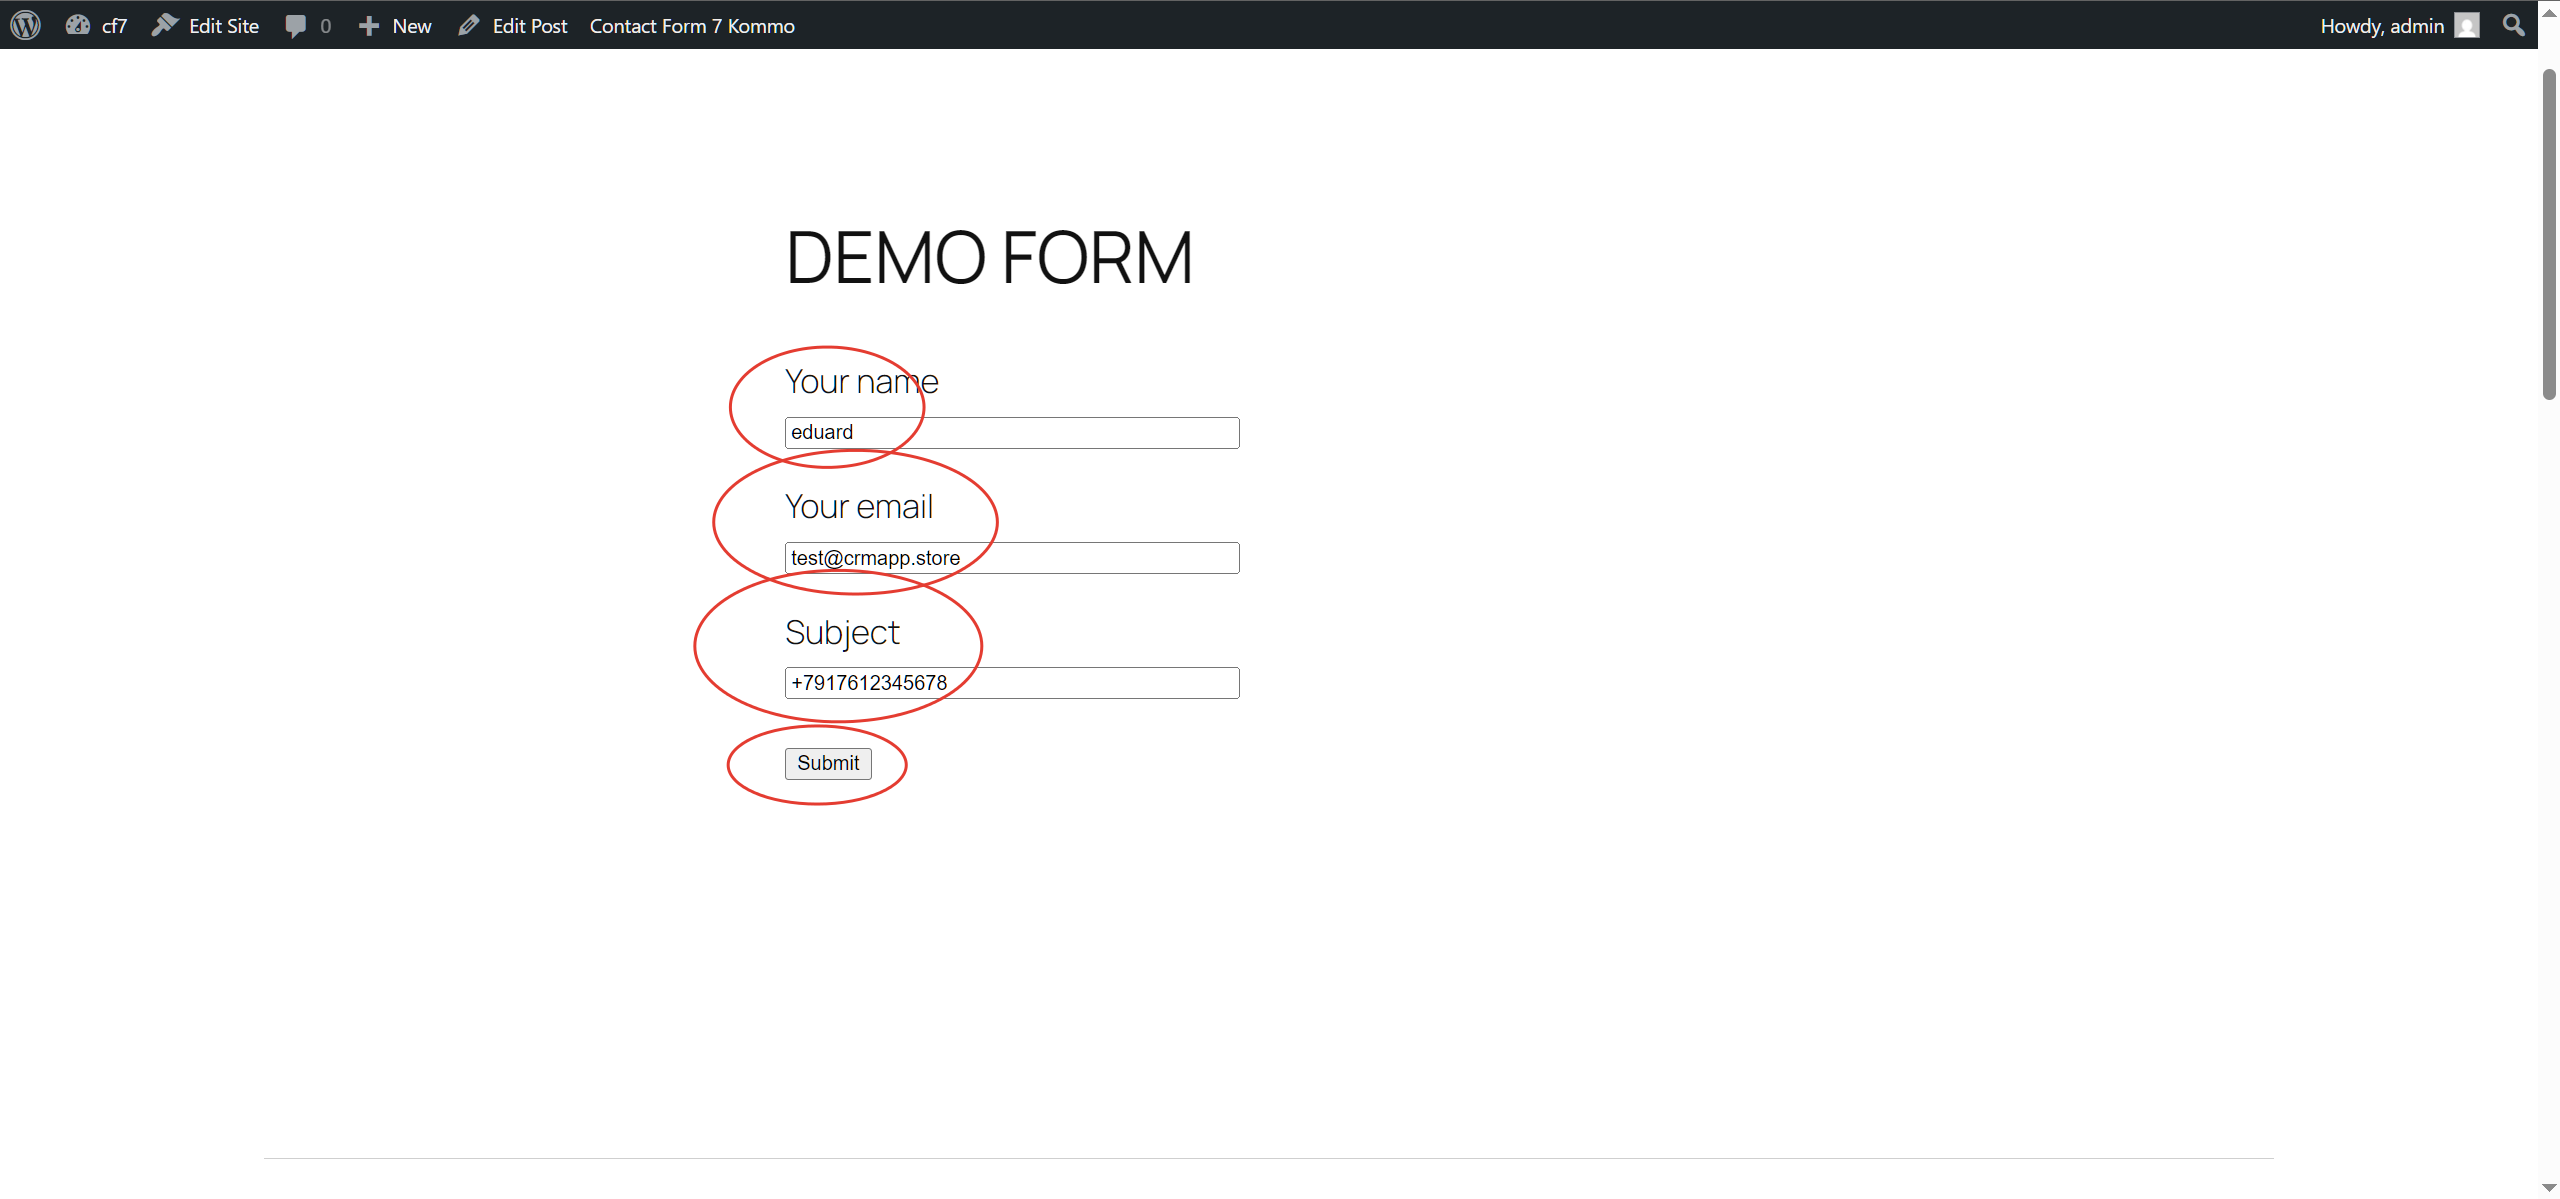
Testing data submission
Open the website page containing the configured form. Fill in all required fields and click "Submit." If everything is set up correctly, the entered data will be sent to Kommo.
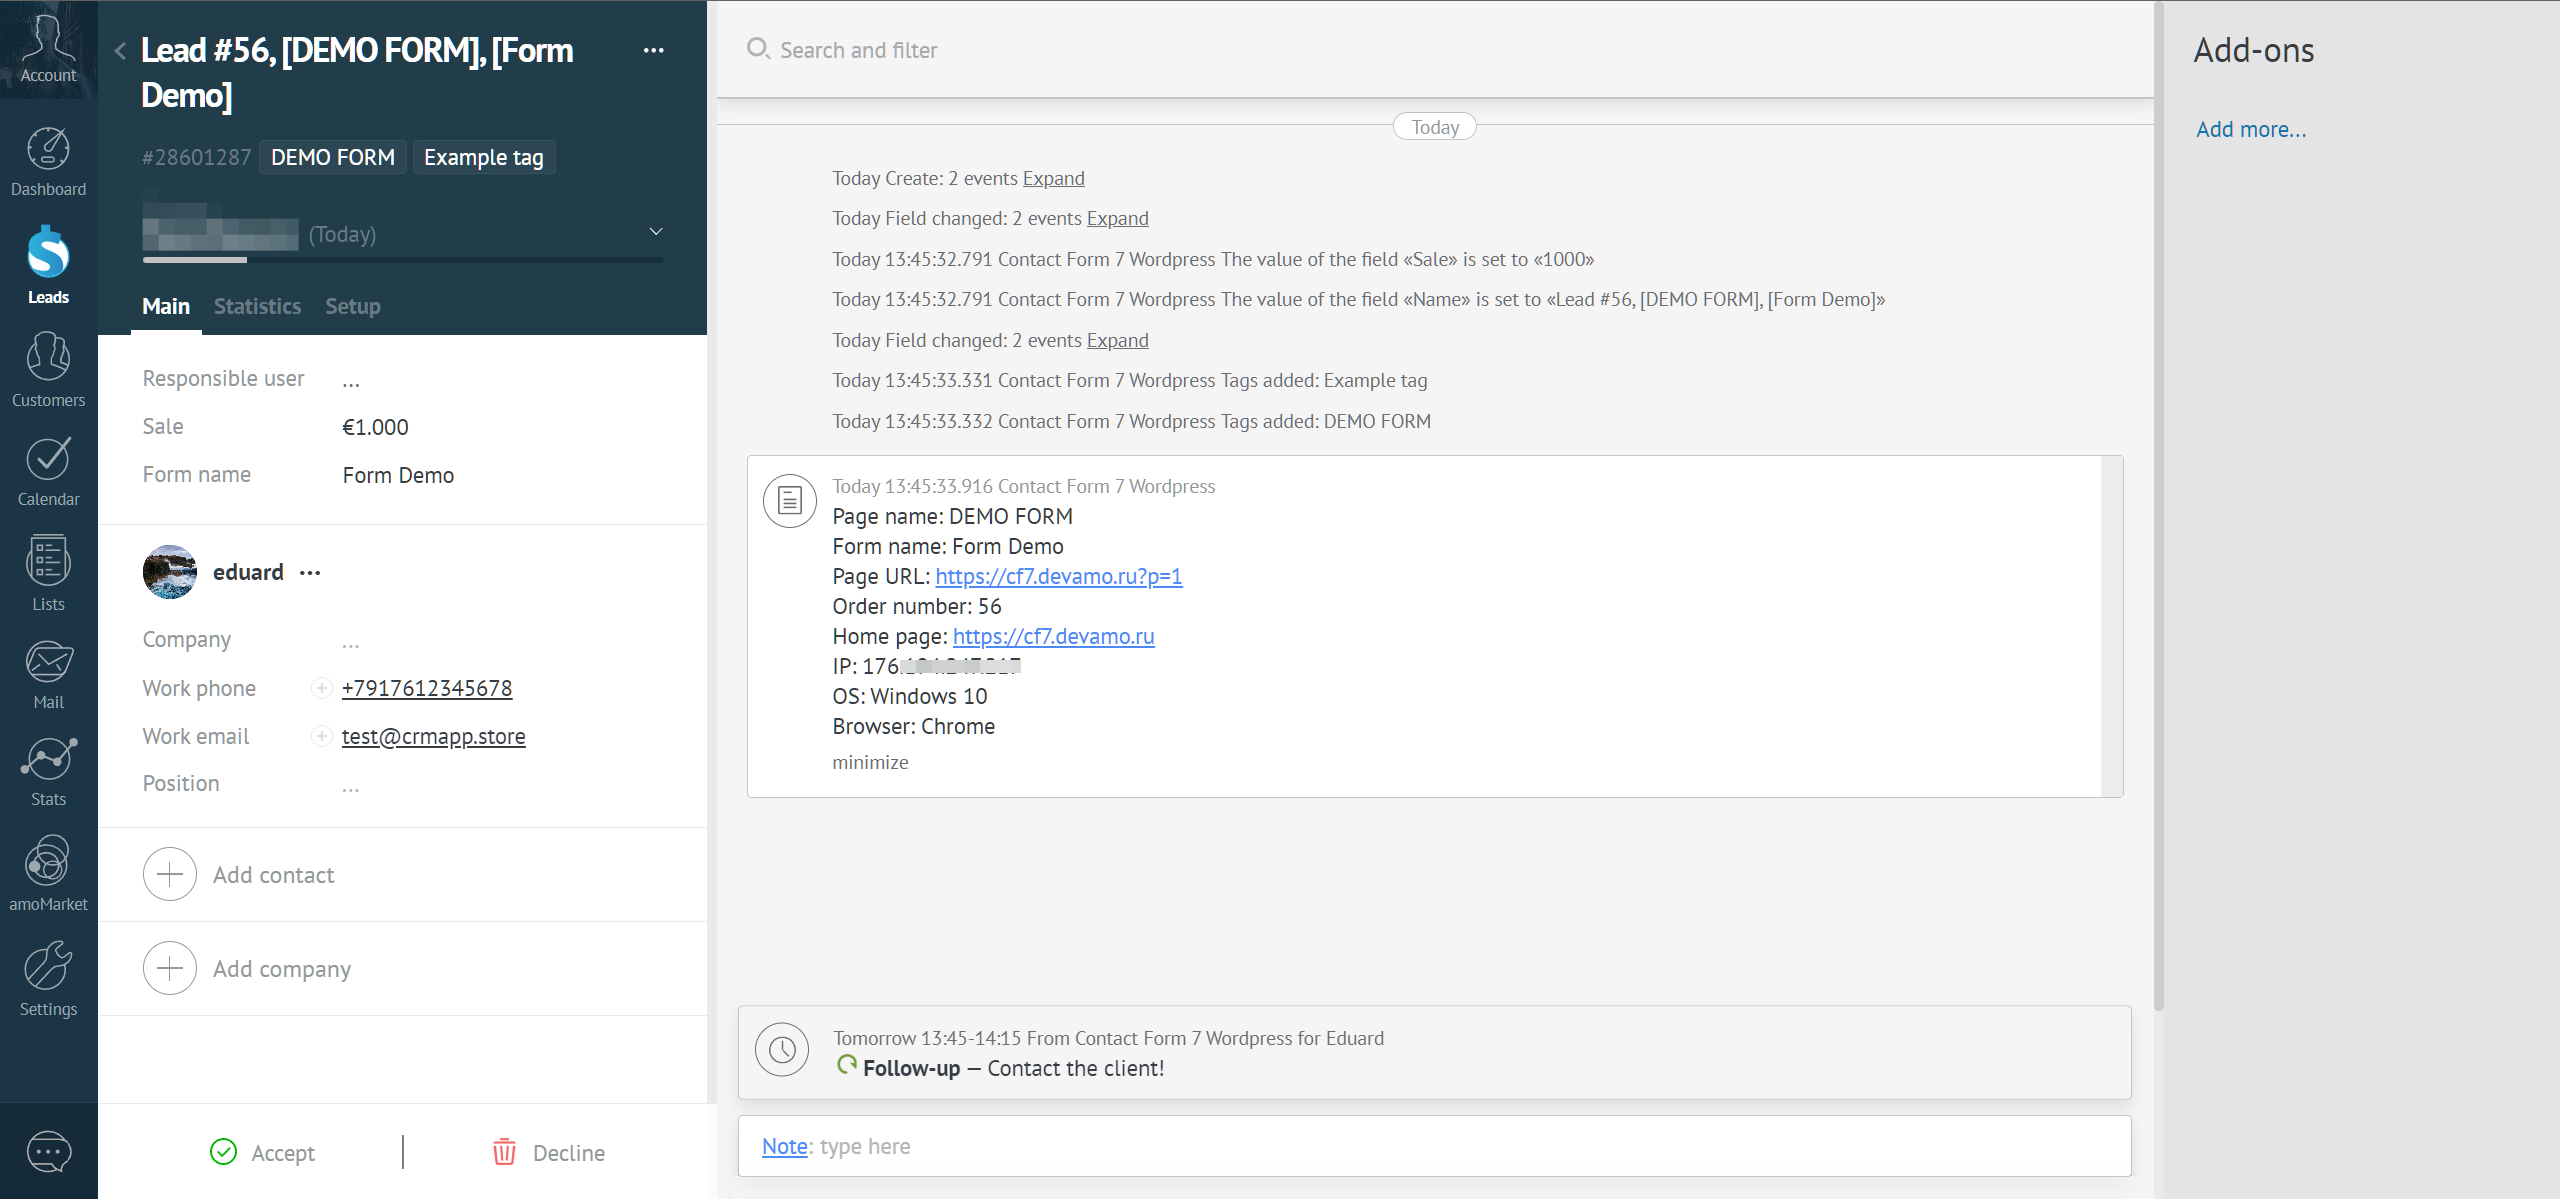
Verifying received data
Before finalizing the Contact Form 7 integration with Kommo, carefully check the created Lead along with the contact or company. Ensure all received information is correct and up-to-date to avoid future errors. If you find any mistakes, return to the form settings in the integration. Thorough verification will help prevent issues and streamline your workflow.
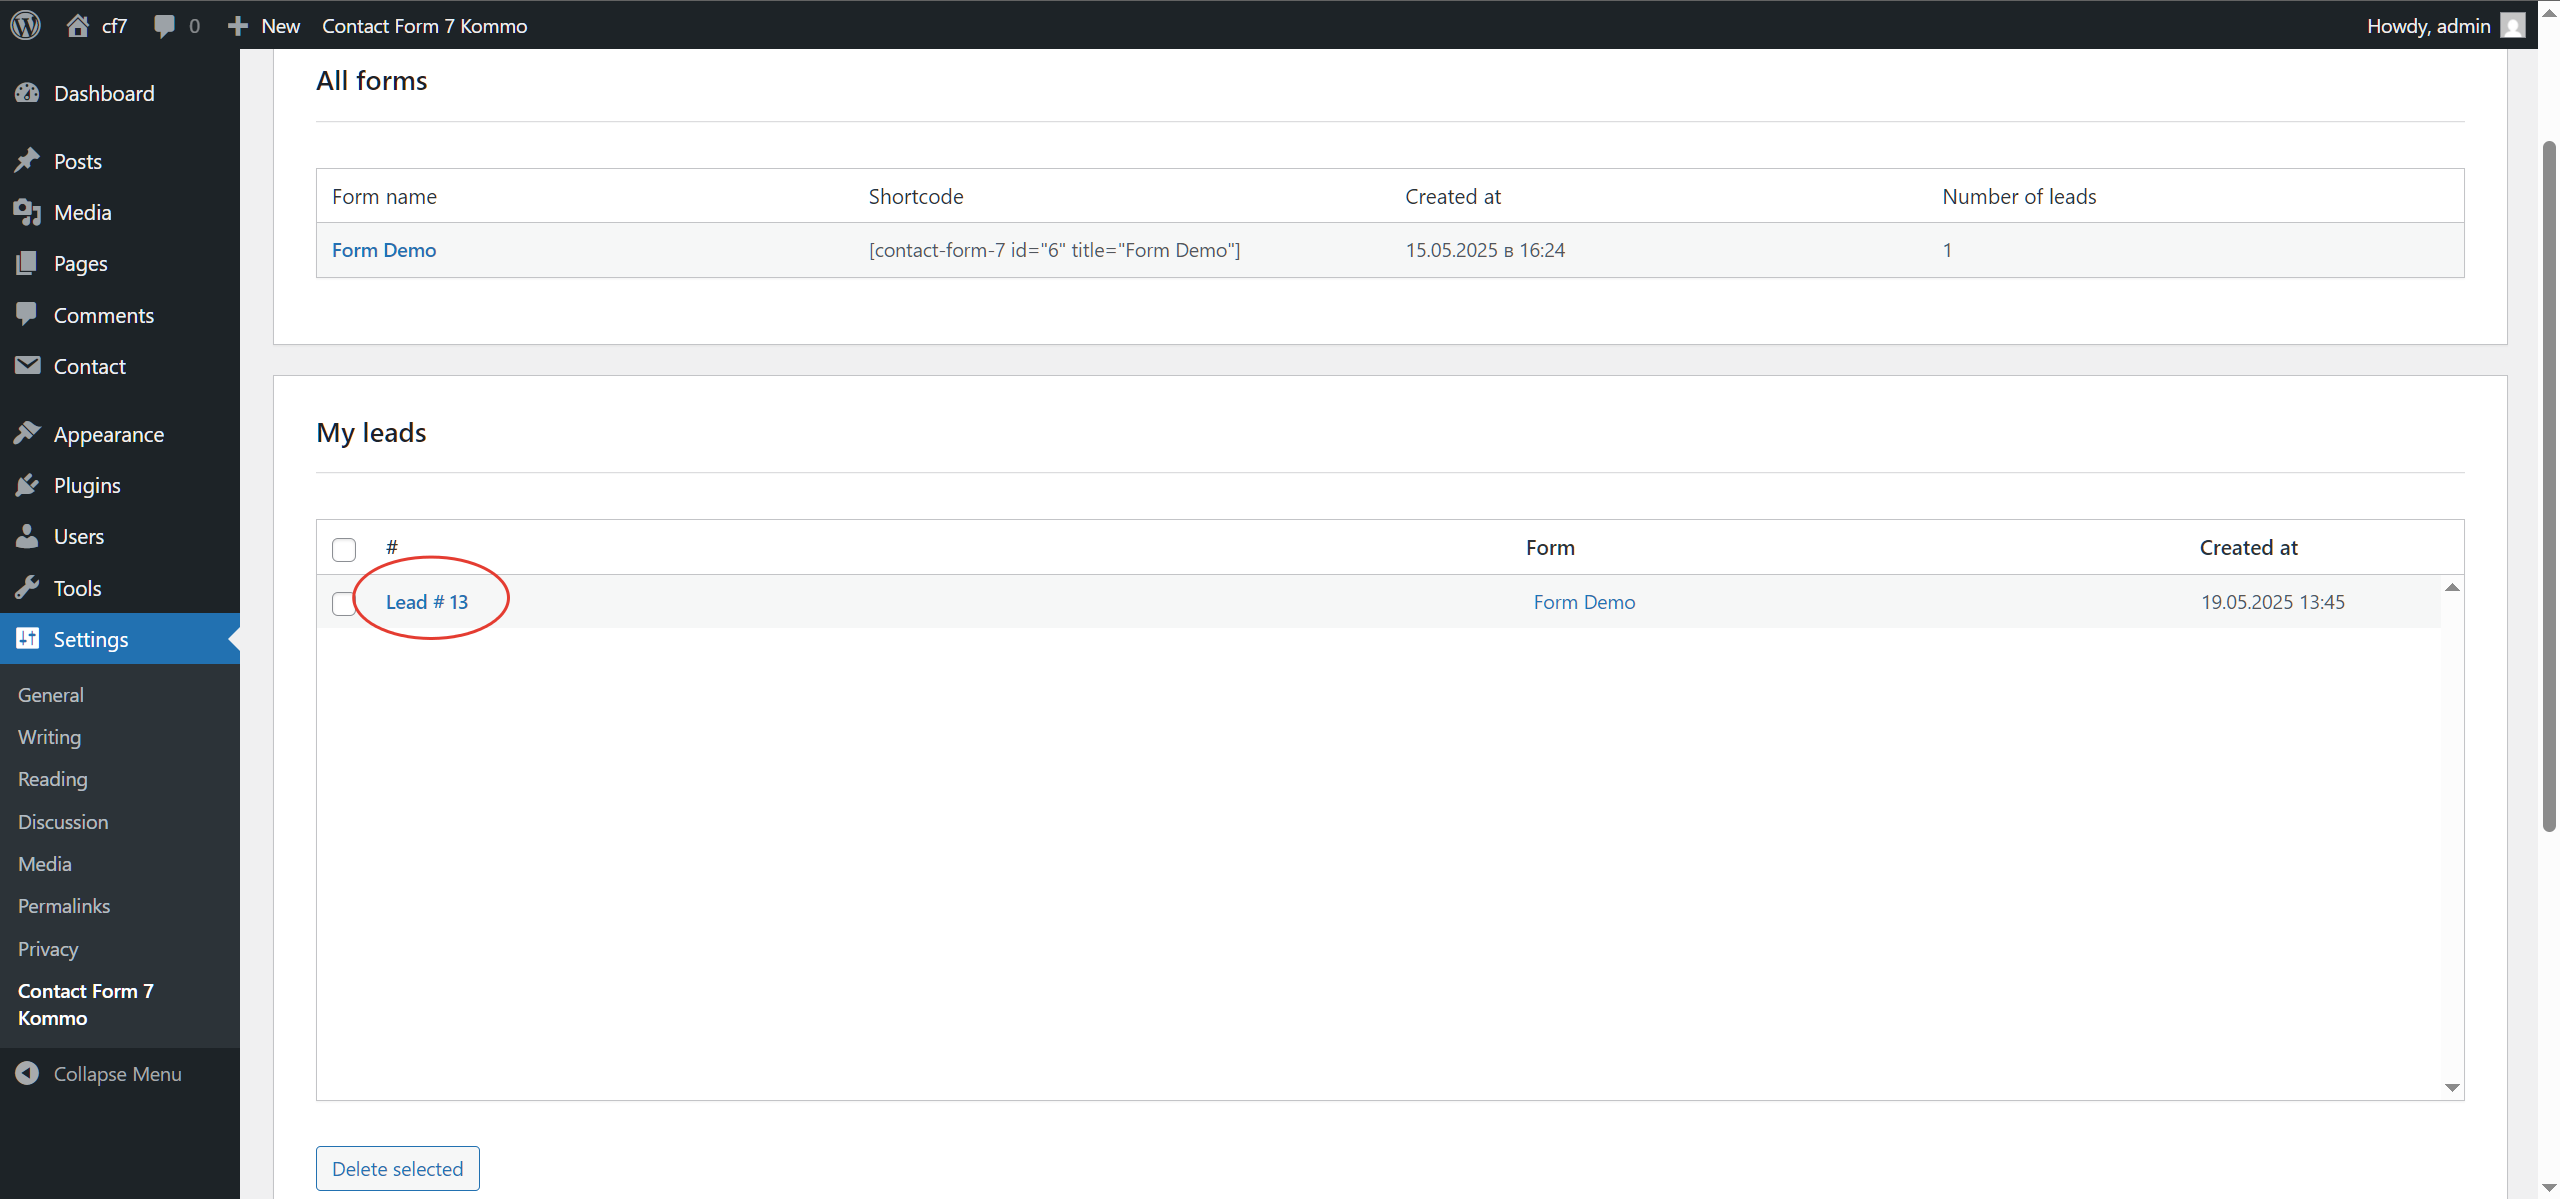
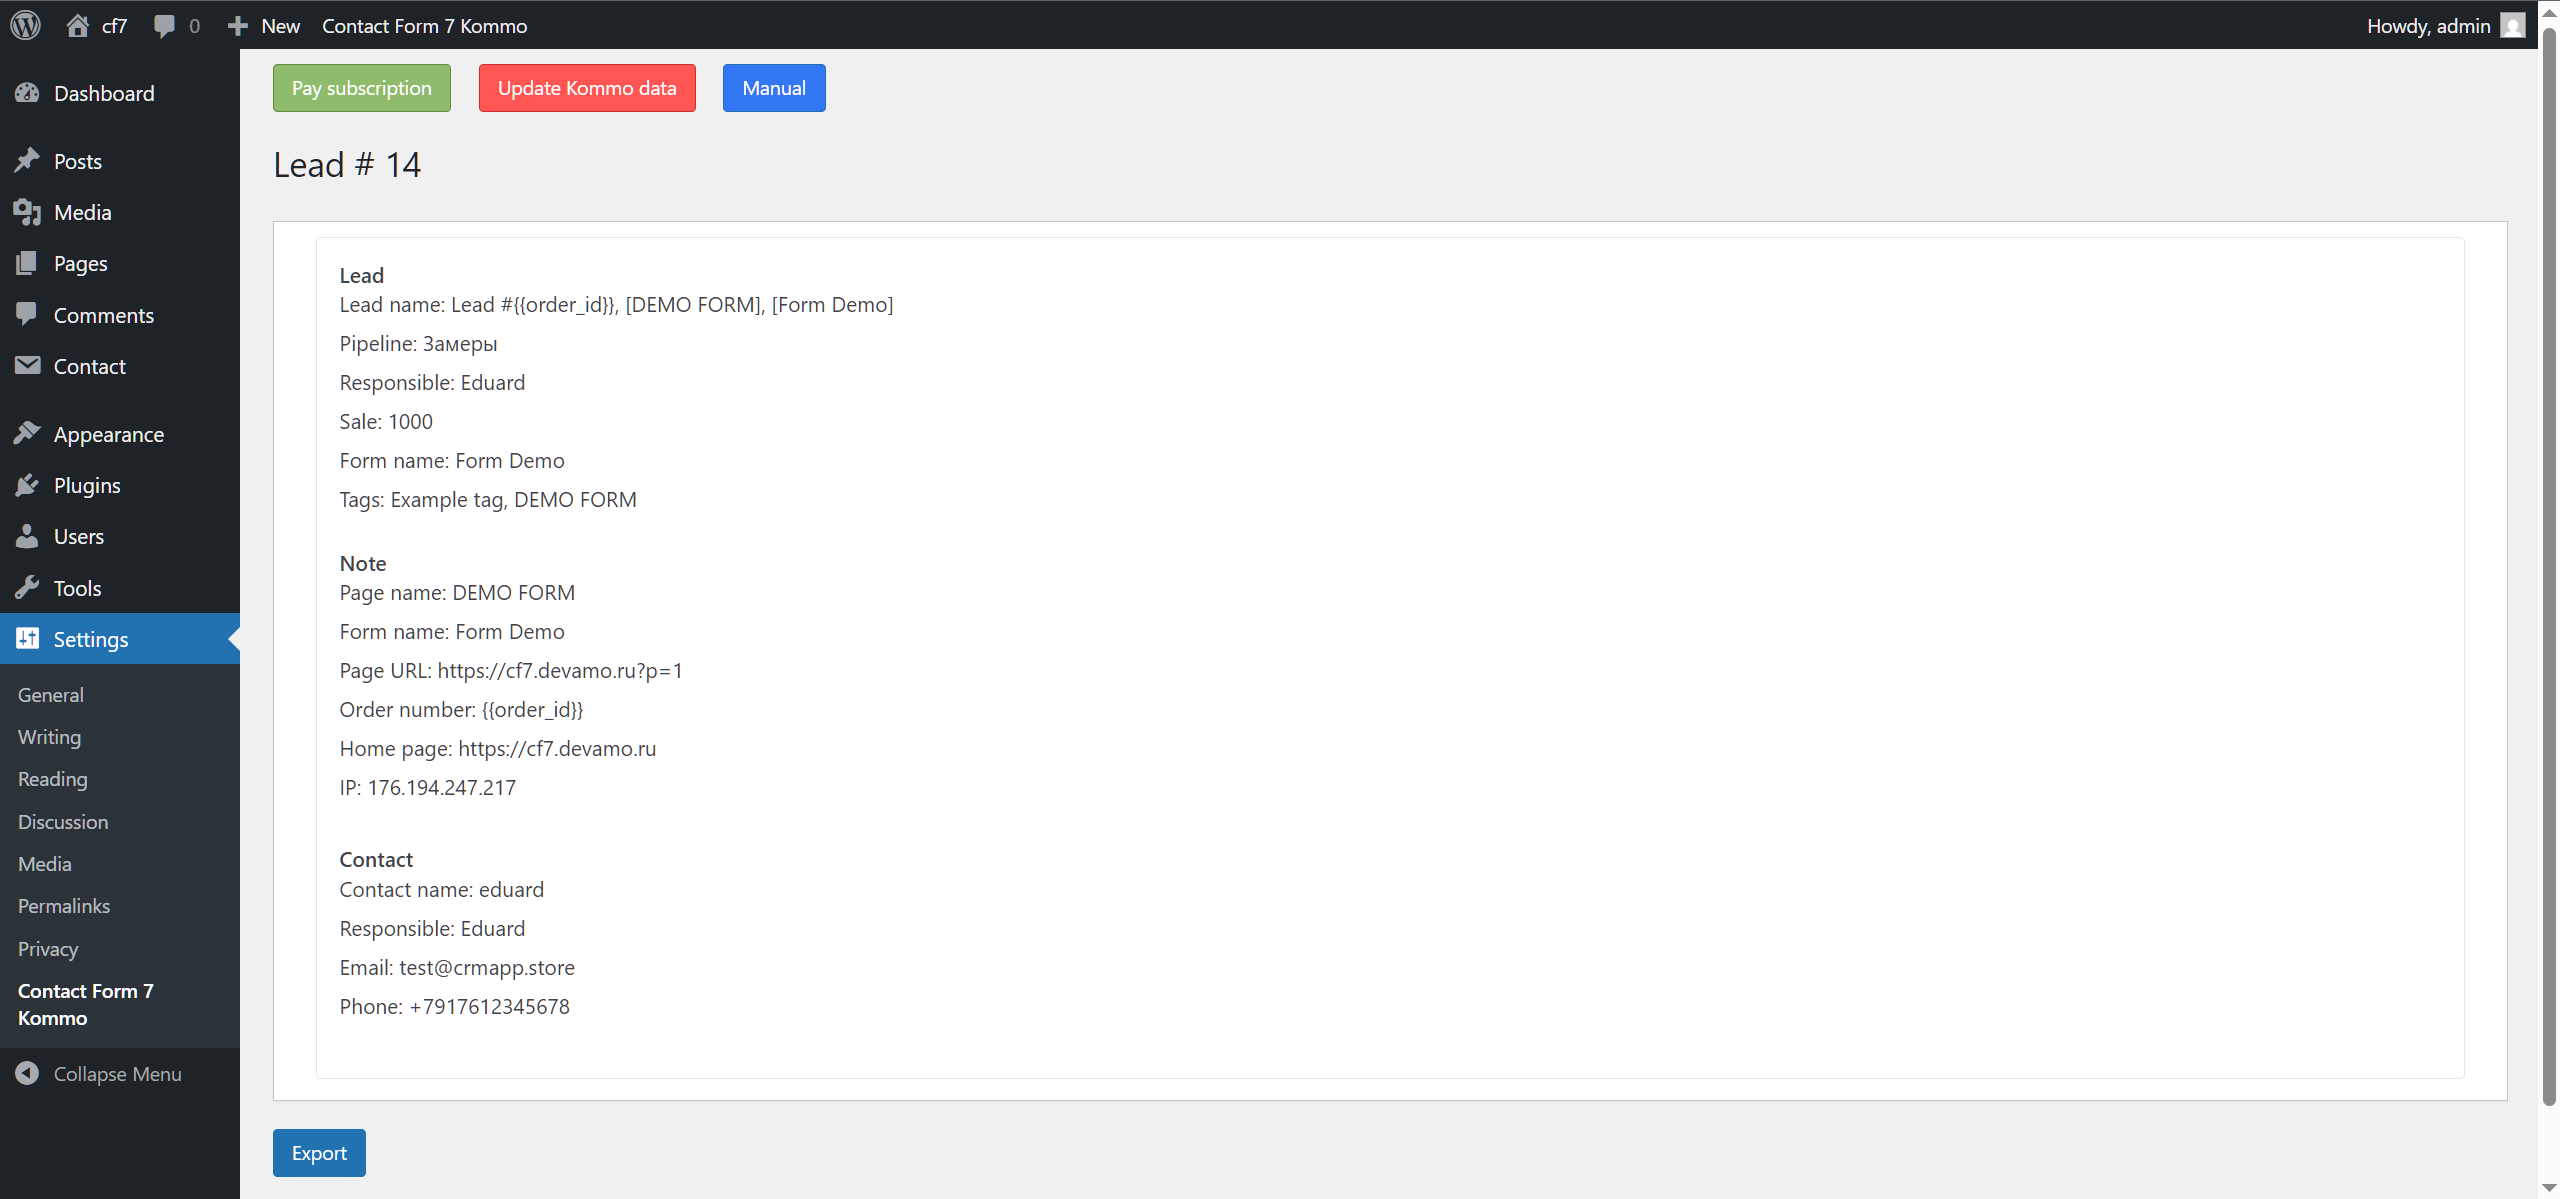
Saved request and resubmission
Immediately after form submission, a new request will be saved in our plugin settings. You can review the submitted information and, if necessary, re-export it by clicking the corresponding button.
For any issues, create a support request or contact us on telegram.